If you have read other articles in the raw milk series, you are by now probably familiar with the benefits of eating raw, locally produced milk. From beneficial microbes to supporting your local food system, consuming raw milk is great for addressing several environmental and personal health needs!
This article will help you make your own at-home fermented butter and buttermilk. If you have already tried making your own yogurt or cheese, making your own butter will be a breeze. If you are new to the scene of at-home dairy products, don’t worry. Homemade butter is one of the simplest yet most satisfying creations in the raw milk spectrum of possibilities.
You may have seen butter in the grocery store that is either called “Fancy Butter,” “Cultured Butter,” or “European-style Butter.” All these butters are basically doing the same thing. The producers take cream, pasteurize it, add a fermenting agent, let it ferment, and then churn it into butter. You can do the same at home with comparable results at a much higher value. As a bonus, you can use the yogurt you made from raw milk!
What You Need To Make Cultured Butter
To make your own cultured butter, you will need:
- 1 pint to 1 quart of high quality, local, raw cream (depending on how much butter you want to make: more cream, more butter)
- A saucepan
- A thermometer
- A spoon
- 2-3 clean, sanitized pint or quart jars
- A hard-sided cooler box
- 1/4-1/2 cup fermenting agent such as yogurt, kefir, cultured buttermilk, or your preferred culture (could be a packet of culture)
- Many sets of helping hands
- A sieve or cheesecloth
- A glass bowl
- A rubber spatula or wide, flat wooden spoon
- Cold water
How To Make Raw Milk Cultured Butter
- Place your cream under very low heat in the saucepan. Slowly raise the temperature of the cream to 150 degrees Fahrenheit, stirring occasionally to prevent a skim from forming on the top of the cream.
- Depending on which starter culture you use, you will then need to cool the milk to the appropriate fermenting temperature. If you are using standard yogurt then you will need the cream to cool to 120 degrees. If you are using a room-temperature culture such as kefir, be sure you cool your cream appropriately before adding the starter or you risk killing the bacteria that do the fermenting!
- Once the cream is cooled to your goal temperature, add the starter and mix well.
- Pour the milk into the clean and sanitized jar.
- Close the lid of the jar and insulate it in a hard-sided cooler to ferment for about 6-8 hours. You do not need to ferment the cream the same amount of time as yogurt because you do not want it to come out as yogurt! You just want to get the fermentation started so that the healthy bacteria alter the flavor and composition of the cream without losing that sweet cream flavor. Adjust your fermentation time to your taste as well as the culture you are using.
- Once your cream has fermented a bit, take it from the insulation and let it cool completely to room temperature. You may even want to refrigerate it a bit.
- Next gather your arm endurance, the family, or a few friends, because it’s time for a good old-fashioned butter churn! The method of making butter is as simple as this: shake the jar. Shake the jar for as long as it takes to suddenly see the fat globules separating from the butter milk. You may want to make a game of this by having a competition to see how long each person can shake the jar, having jar shaking relays, or any other fun game you can come up with. I have seen other methods in which you can use your food processor to whip the cream into butter, or even by using a whisk to separate the fats. I prefer the shaking a jar method just because it is so direct and instead of cutting the butter, you end up getting nice fat globules that form nicely into a pat.
- Whichever direction you choose to take in your churning method, once you see a majority of the fats have separated from the milk, it’s time to clean the butter. Pour off the buttermilk through the sieve or cheesecloth and reserve it in a jar. This can now be used in pancakes, muffins, scrambled eggs, or in the making of your at-home farmer’s cheese!
- Now continue the cleaning process: Even though you have separated the fats from the milk there will still be little pockets of milk within the pieces of butter and you will need to squeeze them out in order to be left with just pure butter. (If you have used a food processor to make the butter, this will be the moment when you will need to gather all the tiny pieces of fat together to make a pat of butter.)
- Fill your glass bowl with very cold water and place the butter globs in the water.
- Using your rubber spatula or flat spoon, press down on the butter, pushing it to the bottom of the bowl. Slowly drag the butter under the water up the inside of the bowl, pressing the globs together and smearing it against the bowl.
- Continue this practice until you have formed the butter into a cohesive pat. At this point the water should be very milky. Pour it out and replace it with fresh cold water, repeating the cleaning process. You should “clean” the butter this way until the water no longer turns milky with your pressing of the butter.
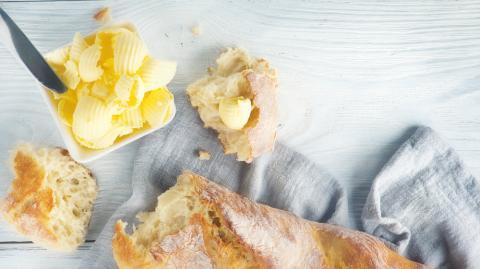
- The butter is now ready to use! You can now press any additions you may want to flavor the butter such as salt, cinnamon and sugar, herbs, or any combination of things you may want. I like to separate my butter into four little pats and create a small butter spread that I can then enjoy at a dinner party with bread as an appetizer.
P.S. If you need help finding a local dairy farmer in your area, you can try sources such as the USDA Local Food Directory which has information for finding farmer’s markets all over the United States!


