Why settle for store-bought food when you can have fresh, seasonal produce growing on your windowsill? Here’s the best part: It’ll cost you practically nothing. After all, seeds are relatively cheap, and if you already have access to soil and pots, you're set. You can even grow some of these from scraps! Just follow these simple instructions and you'll be growing (and eating) autumn bounty in no time.
Spinach

There’s a reason Popeye loves spinach so much: It’s a great source of iron, potassium, vitamins A and C, and folic acid (among other various nutrients). These nutrients will give anyone (not just Popeye) a significant boost in energy and strength.
While you can always find spinach in the grocery store, fall is spinach growing season. Why not give it a try yourself? The best part is that it’s not hard to grow. All you need is a pot (with a drainage hole) that’s 6-12 inches across, organic soil, and organic spinach seeds. Sow the seeds at least one inch or so apart. Spinach likes a lot of water, so make sure the soil is always moist (not soggy). Keep the pot in an area that does not exceed 80 degrees Fahrenheit (spinach doesn't do well in heat). The spinach should be ready to harvest within 40-45 days. You can use spinach in salads, soups, or as a healthy side dish to any meal. I personally love to drizzle a little lemon juice on it, then add it to omelets (simple, but effective).
Lettuce

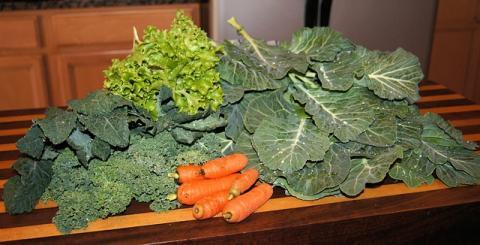
Lettuce may be mainly water, but it is perhaps one of the easiest vegetables to grow. Similar to spinach, you’ll be able to harvest it after 45 days, or sooner, depending on the size leaf you want. It’s easy to grow lettuce from seed too: all you need is a terra cotta pot that’s 6-12 inches across, a plastic bag, organic soil, and organic lettuce seeds. Since lettuce really loves water, I recommend taking a plastic bag and putting it inside the pot. This will help keep the soil moist and speed the growing process. Add the soil into the bag/pot and then add the seeds. I like to sprinkle as many as a handful in randomly. I usually just thin them out when they start to sprout (which takes 7-14 days approximately), or leave them as is. Lettuce will grow even when left a little unkempt. As long as you water it every day (but avoid drowning the leaves – aim for the soil), they’ll grow very quickly.
Garlic

Garlic has the ability to give a meal that extra flavor-punch you’ve been looking for. Not to mention it’s packed with healthy nutrients like manganese, vitamins B6 and C, selenium, and fiber. It’s also always handy to have around when you’re sick with a cold (and it is cold season now, after all). To grow it, you don’t exactly need garlic seeds: The bulbs are the parts you need to create more garlic, so take your garlic head and gently separate the bulbs before planting. You need to get the perfect container for garlic: Try one that’s at least 6 inches deep and 6 inches wide with multiple drainage holes. Garlic thrives in organic soil, so make sure to invest in some. To plant the garlic, fill the pot up halfway with your soil medium, then insert the bulbs (make sure the pointed side is facing up). After that, you can fill the pot with more soil. Be sure to press around each clove to secure it. Make sure your garlic gets plenty of water and the soil stays moist. It can take a while to see any signs of growth: Out of all the fall vegetables on this list, this one takes the longest to grow. Expect green shoots to come up in spring (you can harvest these too – they’re great in a stir fry), but the actual garlic won’t be ready until June.
Arugula

Arugula is one of my favorite additions to salads and sandwiches. Ever try an arugula, goat cheese, and beet sandwich? You need to if you haven't. Not only is arugula tasty, but it’s also good for you: It’s packed with phytochemicals that have been shown to combat cancer-causing elements in the body (pretty impressive, huh?). The best part is, it’s fairly easy to grow. Try planting some organic arugula seeds in a container with drainage holes that’s at least 8 inches deep and 6 inches across. Arugula should do well in any sort of soil, but using high quality, organic soil will produce the best possible crop. To plant, just add the soil to the pot, then add a few of the organic arugula seeds. Make sure they’re a decent distance apart and about ¼ inch deep into the soil (in other words, poke a hole in the soil, place a seed there, and then cover it with a pinch of soil). I suggest planting 3-5 seeds in your container (if you choose to get one the size I recommended). Place your arugula plant in a place where it’ll get at least 6 hours of sunlight a day and make sure you water (but never over-water) consistently. In 3-10 days, you’ll start to see sprouts, and in 30 days, your arugula will be ready for harvesting.
Kale

When I was a teenager I swore I’d never eat kale. It’s safe to say I broke that promise. I’d be crazy not to: not only is it amazing in salad, but it’s also loaded with vitamins K, A and C, fiber, iron, and antioxidants (my teenage brain couldn’t process all that, though). Since kale is so popular, it’s pretty nifty to know how to grow your very own supply of it. Want to be the envy of all your health-conscious friends? All you need is a pot that’s at least a foot across, some organic soil, and organic kale seeds. Fill the pot with your chosen soil, and then add at least 3-5 organic kale seeds (be sure to give them a decent amount of space away from each other). You want to place the pot in an area that gets at least 6 hours of sunlight, but kale may wilt if it gets too much sun. To avoid this, you can add straw, pine needles, compost, or even bark to the base of your plants so it helps them retain moisture. Make sure to water frequently, but not too much (the soil should be moist down to about an inch into the soil, but not further than that). Good drainage is key, so make sure your pot has drainage holes. When the kale is ready for harvest, be sure to pick the leaves from the bottom of the stalk up. It’s best to leave at least four leaves intact to promote continued growth.

