Buying makeup is fun, but it can get costly. If you're feeling creative (or low on cash), these recipes will help you craft your own cosmetics in the comfort of your own home. Best of all, you won't have to worry about any toxic chemicals that conventional beauty brands use. After all, these recipes utilize ingredients you can mostly find in your kitchen cabinets. Just be warned: Things might get a little messy!
Eye shadow
I use eye shadow on a daily basis, but I haven't used conventional eye shadow in a long time. Instead, I buy from all-natural brands, ones that always have ingredients I have no trouble pronouncing. However, if I'm in a pinch, I like to whip up my own batch of eye shadows (since even natural eye shadow can get expensive). Here's how you can do the same.
Base Ingredients
¼ - ½ tsp. arrowroot powder
¼ - ½ tsp. shea butter
Colorants
Cinnamon (brown – can be substituted with allspice or nutmeg)
Turmeric (warm yellow)
Beet root powder (pink)
Cocoa powder (dark brown)
Activated Charcoal (black)
Flour (white)
Spirulina powder (dark green)
Acai powder (purple)
Goji powder (orange)
Maca powder (off-white)
Note: You may also substitute any of these colors using mica powders. They also add a natural glittery element to your eye shadow. However, depending on your source, each mica color can add up to $10 or more - much more costly than most of the colorants I've listed above.
Directions
- Add the arrowroot powder to a small bowl. The more you add, the lighter your eye shadow will be, so start with less (you can always add more).
- Add in your desired colorant. You may add as much as you want: The more you add, the more vivid the color will be; the less you add, the more subtle it will be. Mix together using a spoon until you've achieved your desired color (feel free to add more arrowroot or colorant at this time if you aren't seeing the results you want. You can also combine different colorants to create unique colors.)
- Once you've created a color you adore, add the Shea butter. This will give the eye shadow a moisturizing, creamy texture, so the amount you add depends on the texture you prefer your eye shadow to have. You can use the back of the spoon (mixing won't exactly work as well here) to mush the Shea butter and powder together until it's creamy. It'll still mainly look like powder, but the Shea butter will actually help it stay on your lids longer.
- Now it's time to store your creation: A plastic lip balm container will do nicely. You can use your new eye shadow right away, or save it for later! This also makes a great gift idea!
________________________________________________________
Eyeliner
I used to be terrified of eyeliner because I always thought I was going to poke my eye out. Thankfully, that's never happened, and now I adore it. Truth is, the scariest thing about eyeliner isn't poking your eye out, it's the ingredients: most conventional beauty brands won't even list them on their eyeliner packages. I don't think that's right (they could be putting anything in there!), so here's a recipe to start making your own from now on, hassle free.
Ingredients
- 1 bottle of activated charcoal capsules (can be substituted with any of the colorants used for the eye shadows – listed above – to create different colored eyeliner)
- Drops of water (can be substituted with coconut, almond, avocado, or jojoba oil to create different textures)
Directions
- Depending on which ingredients you decide to use, empty the dry ingredient (activated charcoal, cocoa powder, or other powdered colorant) into a small container. The size of your chosen container will determine how much of each ingredient you'll need, but I recommend using at least 10 activated charcoal capsules, if not more. The container can be an empty lip balm holder or a tiny tin you have lying around. Just make sure it's clean before use.
- Charcoal can be used as an eyeliner on its own without adding anything else. However, if you like your eyeliners to feel more creamy, gel-like, or paste-like, now is the time to add your chosen liquid ingredient (such as water or coconut oil). Start with mixing in just one or two drops of the liquid ingredient and experimenting from there. Only stop adding the liquid when you feel you have reached your desired consistency.
- You can test your eyeliner out by applying it to your eyelids with an eyeliner brush. Once you've found something that works for you, you may use it right away, or later. Either way, make sure the container you put it in has a corresponding lid - this stuff is messy when it spills!
Note: You can find activated charcoal online or in drug stores. It is usually sold in capsule form because it is most commonly taken for indigestion. However, if you choose to use activated charcoal capsules, all you'll have to do is break each capsule open to use the charcoal. One bottle should create enough eyeliner for a whole year.
________________________________________________________
Mascara
I have fairly long eyelashes, but they're not very thick. Mascara gives them that extra oomph that always completes my look. That said, I hate clumping it on to the point you can tell I'm wearing mascara. If you want a natural, clump-free mascara that'll enhance your already beautiful lashes, look no further.
Ingredients
- 2 tsp. coconut oil (or any other plant-based oil)
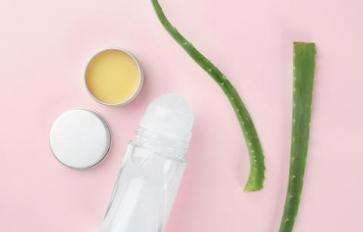
- 4 tsp. aloe vera gel
- 1-2 capsules activated charcoal (makes black mascara but feel free to use eye shadow colorants – from the first recipe -- to make different colored mascara)
- ½ - 1 tsp. grated beeswax
Note: Feel free to experiment with the amount of each ingredient to create different results. For example, if you want more of a waterproof mascara, increase the beeswax to 1 tsp. You can increase or lessen other ingredients, too, for different results.
Directions
- Place coconut oil, grated beeswax, and aloe vera gel into a small saucepan and stir until completely melted.
- Open the activated charcoal capsules (or any other chosen colorant) and mix them into the saucepan until completely incorporated with the other ingredients.
- Turn off the heat and pour the contents into a plastic bag. Make sure to be careful and let the mixture cool down a bit. Push the mixture towards one corner of the bag, and then cut a very tiny hole in the opposite corner of the bag. This is going to act like a funnel.
- Push the contents through this new hole and stream into an empty, cleaned out mascara tube. Warning: This part might get messy, so it helps to have someone else holding the mascara tube as you stream the newly created contents into it. Make sure to place a paper towel underneath you as you do all this – in case you spill any!
Note: Since all these recipes are natural ones, they have no preservatives: In other words, they won't last as long as conventional makeup. My advice to you is use your DIY makeup as soon as possible, then after 3-4 months, make a new batch. If you gift any of your creations, be sure to make this clear to your gift receiver too, so they know to start using the makeup right away.