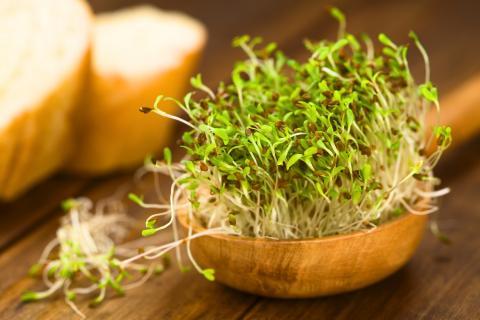
For clever farmers, alfalfa is a nitrogen-fixer, but for those of us who aren’t quite on that scale yet, alfalfa sprouts add a fabulously light, crunchy, young-green flavor to any meal. And they taste even better when you grow them yourself…in your kitchen…with materials you (probably, hopefully) already have on hand!
While shopping around at a new organic food store in the neighborhood, my partner and I found some alfalfa seed sitting high on a shelf next to a jar specifically designed for germinating grains and seeds like alfalfa. We could have bought the inexpensive contraption, but decided that surely there must be a way to do-it-yourself without the special jar. (Also, we try not to buy kitchen tools that only appear to serve one purpose in the kitchen.) So, with mouths watering at the thought of alfalfa sprout turkey sandwiches, we set out to find a way to germinate the tasty little seeds. It took some time (and an experimental trial with our French press) to figure out the safest and most economical way to do this; our goal was to only purchase the alfalfa seed ($13.99 for 1 lb. on Amazon!) and repurpose items we already had in our possession.
Alfalfa sprouts are low in calories, high in antioxidants, and packed with vitamins and minerals. One 100g serving of alfalfa sprouts contains 14% of our recommended daily intake of vitamin C and about 38% of our recommended daily intake of vitamin K, which plays an important role in blood clotting and bone formation. In conjunction with the presence of vitamin K, alfalfa sprouts also are a great source of isoflavones and phytoestrogens that can minimize the effects of breast cancer and symptoms of menstruation and menopause. Find more information on the health benefits of alfalfa sprouts here.
Here is how we sprouted alfalfa using repurposed items:
Materials
Organic alfalfa seed
Water
1 recycled glass jar (14 ounces or larger)
1 rubber band
And, well-cleaned, either:
Cheesecloth
Fine screen, like that from an old grease splatter protector or sieve
Lightly used panty hose (like a pair that snagged the first day you wore them!)
A lightly used mesh shirt (like we did)
- Rinse, in a fine strainer, 2 tablespoons of alfalfa seed to clean before soaking.
- In your glass jar, cover the rinsed alfalfa seed with about two inches of cool water.
- Cover your glass with your choice of straining top, securing with a rubber band. Let the seeds soak, out of direct sunlight and in a dry, warm, comfortable, undisturbed environment, for about 8-12 hours. (Preparing this in the evening provides about 12 hours of rest time overnight, so you can do the following step in the morning.)
- Leaving the straining cover on, drain the water, propping the jar at a 45-degree angle so that it may continue to drain over the next 8 hours of rest/germination time. (If the seeds stay too wet, they can begin to mold and rot, which is not so delectable.)
- Continue this process – rinsing, gently mixing around, draining and propping the sprouts in the evening and again in the morning – for between 3-5 days.
- When the sprouts are between 1.5 and 2 inches in length and green, they are ready to eat. Place the jar in direct sunlight, like a window, for up to 15 minutes in order to activate health-boosting enzymes in the sprouts before eating them.
- Store your sprouts in the fridge, which slows growth, for up to one week. Be sure that the sprouts are dry when you store them; if they are too wet, they can still mold and rot in the cool environment.
- Pile your homegrown sprouts on a scrumptious sandwich, toss them in a fresh salad, or munch them with your morning eggs!