Stroll through any health food store and you’re guaranteed to see more than just sprouted broccoli. These days everything from sprouted almonds and walnuts to sprouted oats and lentils don the bulk department and most farmer’s markets have booths that offer freshly baked bread made with sprouted wheat. Unfortunately, most sprouted goods are more expensive than their unsprouted counterparts—take sprouted almonds, for example: a 1 pound bag will cost you close to $15, while the same amount of raw almonds will run you closer to $6 or $7.
The price increase isn’t reason enough to eschew sprouted goods. In most cases, they’re healthier, more easily digestible, and even economical—if you know how to sprout yourself. Here’s the run-down on sprouted foods.
Health Benefits of Sprouted Foods
Sprouted grains have more nutrients, in large part because the nutrients are more readily available to us. As Harvard Health Publishing explains, these nutrients include iron, folate, vitamin C, zinc, and magnesium, all in forms that are more absorbable.
A 2015 study demonstrated marked improvements after sprouting cowpeas: protein increased by 9-12%, vitamin C increased 4-48 times, and the in-vitro protein digestibility increased 8-20%, while a 1989 study looked at the nutritional improvement of cereals by sprouting. Researchers found an increase of essential amino acids and B-complex vitamins, and a decrease of starch and antinutrients.
Why Sprout?
Not sure what antinutrients are? You’ll want to know this: antinutrients are compounds that inhibit, or in some cases completely stop, the absorption of nutrients found in food; these are most commonly plant compounds, and thus vegans and vegetarians are often most at-risk due to a higher consumption of beans and grains. Common antinutrients include phytic acid and lectins.
Sprouting and soaking both reduce the water-soluble antinutrients so that absorption is increased. Along with getting a higher intake of vitamins and minerals, most people experience digestion benefits, too.
Sprouting 101
Sprouting is easier than you think. Legumes and grains are most often sprouted, but you might be more familiar with sprouted vegetable seeds—think radishes, broccoli, lettuce, sunflowers, and peas. Luckily, sprouting legumes, nuts, seeds, and grains isn’t much different.
Before you start, there are a few things to keep in mind. First, ensure that the nuts and seeds you’re using are actually raw. Some nuts, like cashews, are always processed when you buy them in the store, so soaking them will not actually lead to sprouting (although you might be able to activate them, which is a different story). Secondly, it’s important to use fresh, cool water for soaking, and to freshen it frequently. I like to rinse my grains, legumes, nuts, or seeds every few hours and typically place the bowl out of the hot sun, even if sunlight is being filtered through a window. Avoid sprouting in a humid location; bacteria can quickly breed in standing water, so always check your sprouting foods for mold or other funky colors or smells.
Tips for Sprouting
The first thing to do is collect your ingredients and tools. Ensure that the whole grains you use are actually whole—avoid hulled or flaked grains. Grab a glass jar or other glass vessel, a bowl, a cheese cloth, an elastic band, and clean, filtered water. You can also purchase a sprouting screen for even more convenience, but a cheesecloth works great, too.
To start, you’ll soak your nuts, legumes, grains, or seeds—but the exact amount of time will differ depending on what you’re looking to accomplish.
Place your grains/legumes/nuts/seeds in a bowl and cover with water; let soak for 8-12 hours (for a handy guide on timing, check out this article.)
As a general rule, fill your jar only halfway full of your desired sprouting food (whether grains, legumes, nuts, or seeds), keeping in mind that as the food soaks, it will expand.
Once soaked for the necessary time, rinse well, drain, and place in the glass jar. Cover the jar with the cheesecloth, secure an elastic band tightly, and then position the jar so that any extra water can drop out.
During this draining time, it’s important to rinse the grains often to avoid bacteria growth. Depending on your climate and the grain/legume/nut/seed you’re using, you should see growth within a few days, or even sooner.
Enjoying Your Sprouts
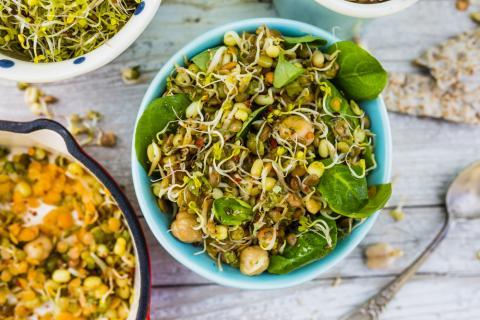
Sprouts can be enjoyed by themselves, but are especially great as crunchy toppers to salads or even soups. You can replace sprouted grains or sprouted beans for their cooked counterparts in grain- or bean-based salads for a fun twist.
For preserved freshness, keep sprouts in the fridge. To extend their shelf life, you can place them in a dehydrator at a very low heat for several hours. They’ll be ready when absolutely no moisture is left in them—when you bite into them, they should crunch.
Have you ever tried sprouting grains, legumes, nuts, or seeds at home? How do you enjoy your sprouts? Let us know in the comments below!